
1. Connection
1.1. Pre-Installation Preparations
The following devices and accessories should be included inside of the package:
• NVR
• IP Network Cameras
• Power Adapters for IP Camera
• CAT Cables
• Quick Guide
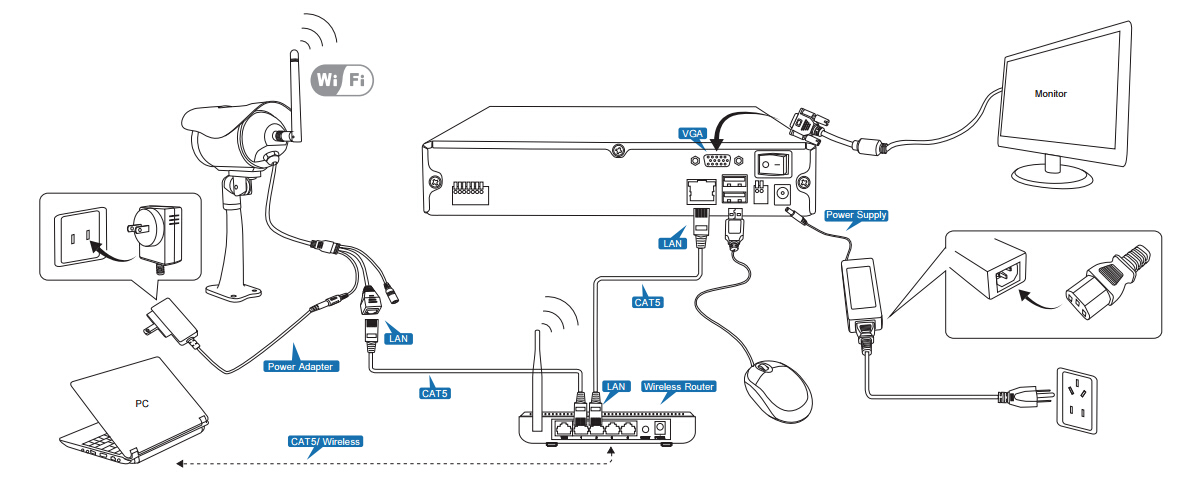
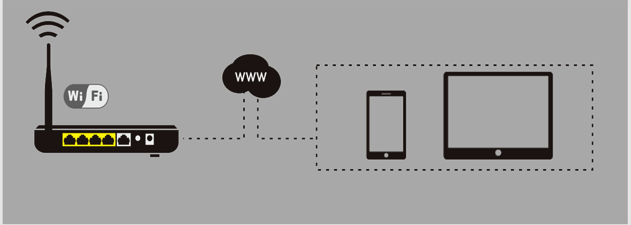
1.2. Power and connect IP Camera & NVR to Wifi Router
1. Power on the IP Cameras and connect IP Cameras to an empty LAN port on your wireless router using the included CAT network cables;
2. Power on the NVR and connect the NVR to an empty LAN port on your router using the included CAT network cable;
3. Connect your NVR to a monitor using a VGA cable.
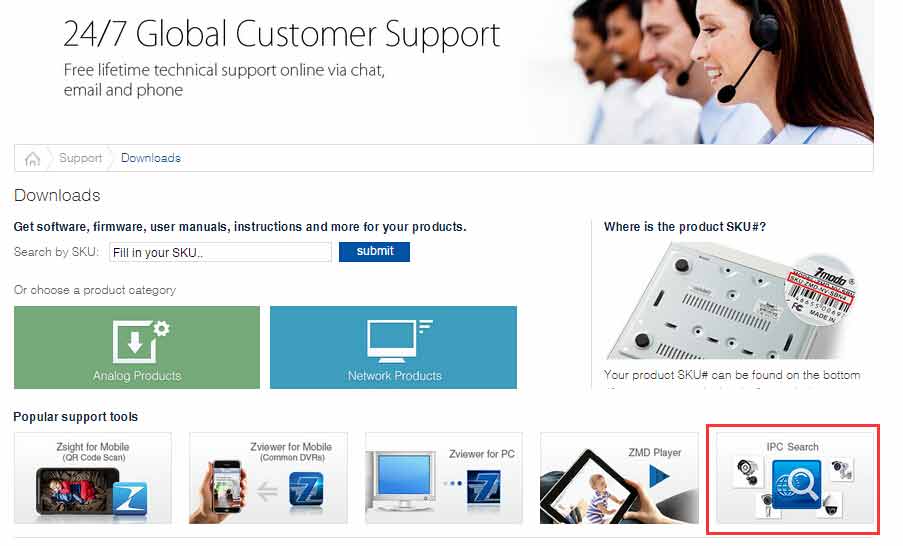
1. Download IPC Search from this page on your computer: http://surveillance.zmodo.com/support-software;
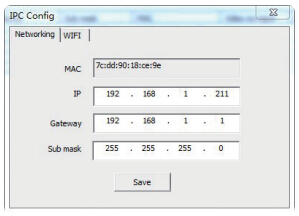
2. Run the IPC Search tool program. The IPC search tool will search for connected IP Cameras on the local network. Click “Refresh”, then all the connected IP Cameras will appear in the list;
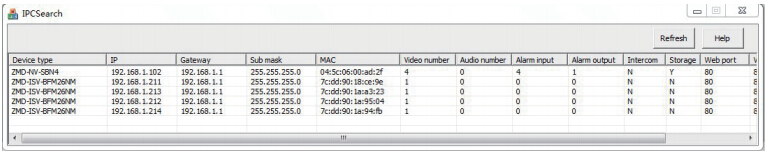
3. Right Click on the IP Camera that you wish to configure and choose networking option, to enter the IPC Config menu;
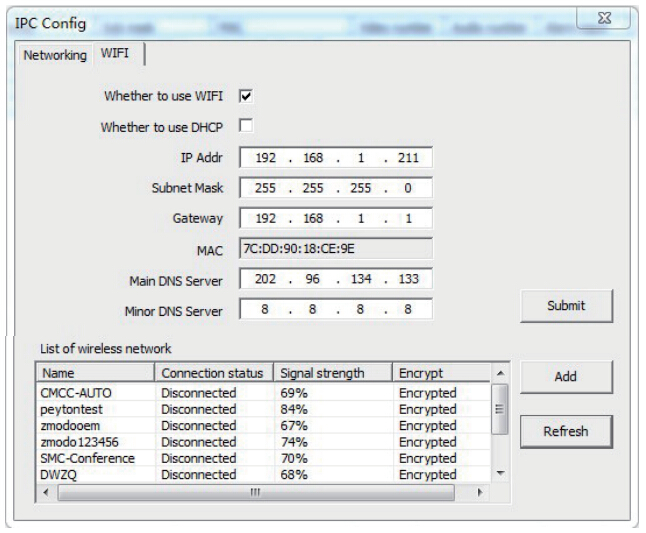
4. Click on the "WiFI" tab and "Refresh" . A list of available Wifi networks will appear in the list. Double click the name of the Wifi network to enter the WIFI Wireless Network Settings menu;
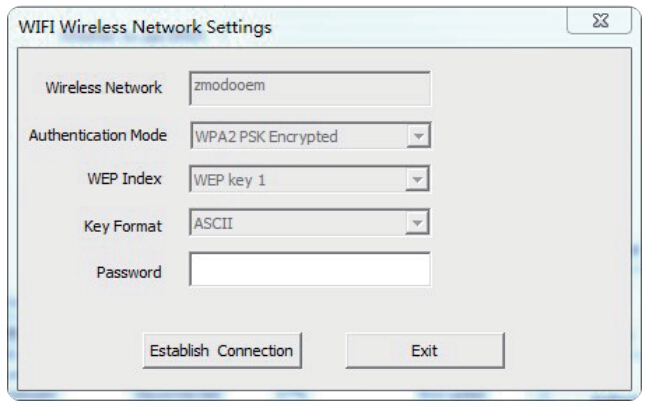
5. From this menu, enter your Wifi password and click "Establish Connection";
6. Click "Refresh" on the IPC Config menu, your cameras should now show Connection Status: Connected. You may need to click "Refresh" more than once before the Connection Status reads: Connected. Now, you may remove the network cables from the cameras and the cameras should continue to communicate with the router wirelessly.
3. Using the NVR
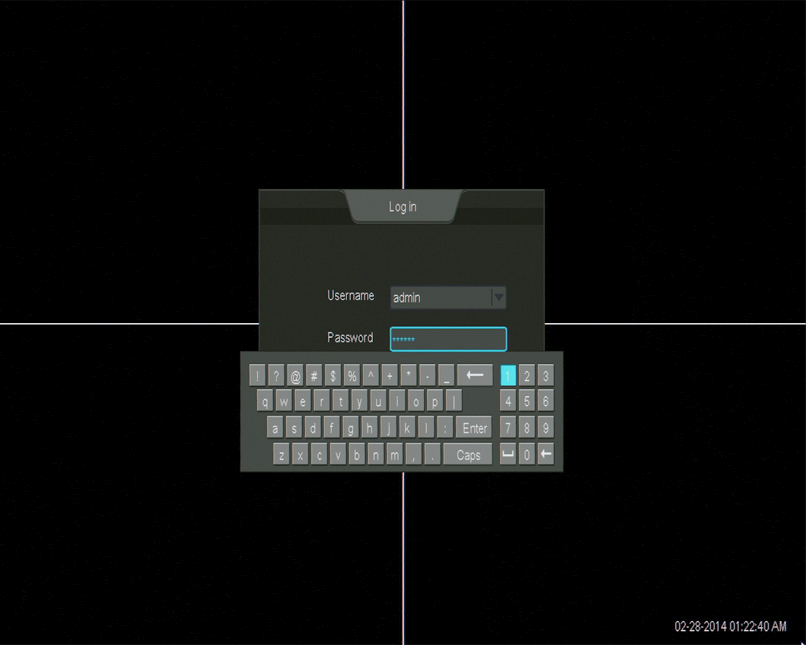
1. Powers on NVR and connect the NVR to your monitor, you will see the NVR log in interface on the monitor, type in admin user name and password (Initial Default User: admin, Password:111111);
2. Access the main menu [  ] by moving your cursor to the bottom left of your screen. When the main menu appears, select and open the [Device Management];
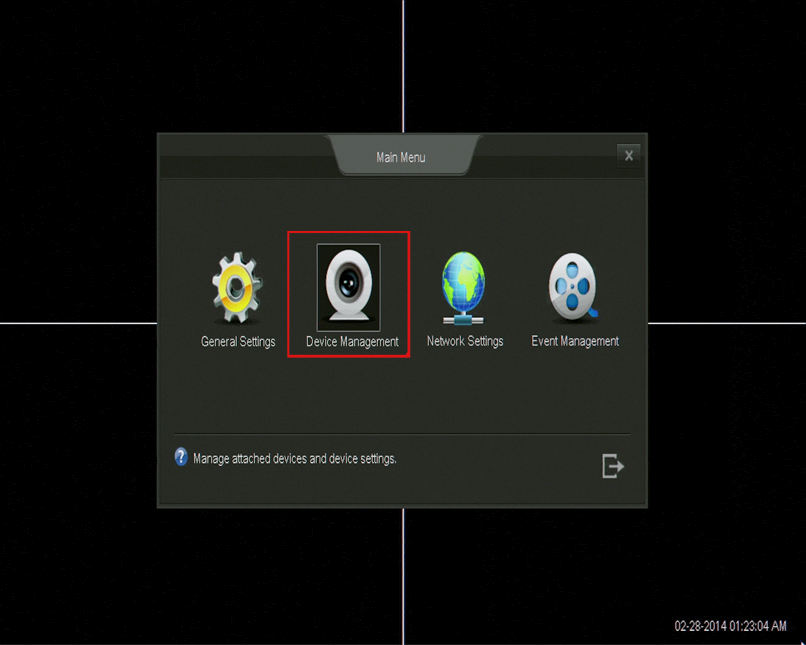
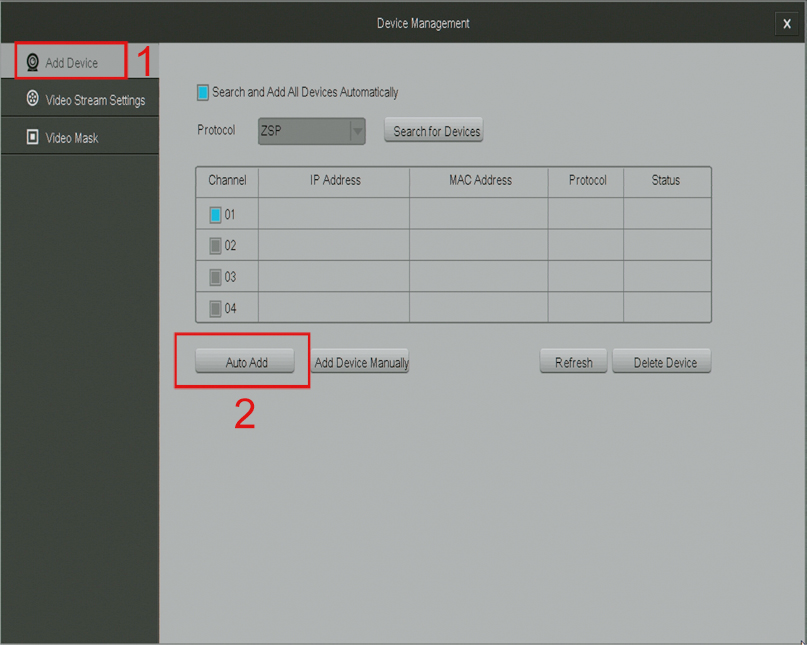
3. Click the [Add Device] option on the left, then click [Auto Add] to automatically search for IP cameras. Please wait 3-5 minutes for the system to automatically add all of the cameras;
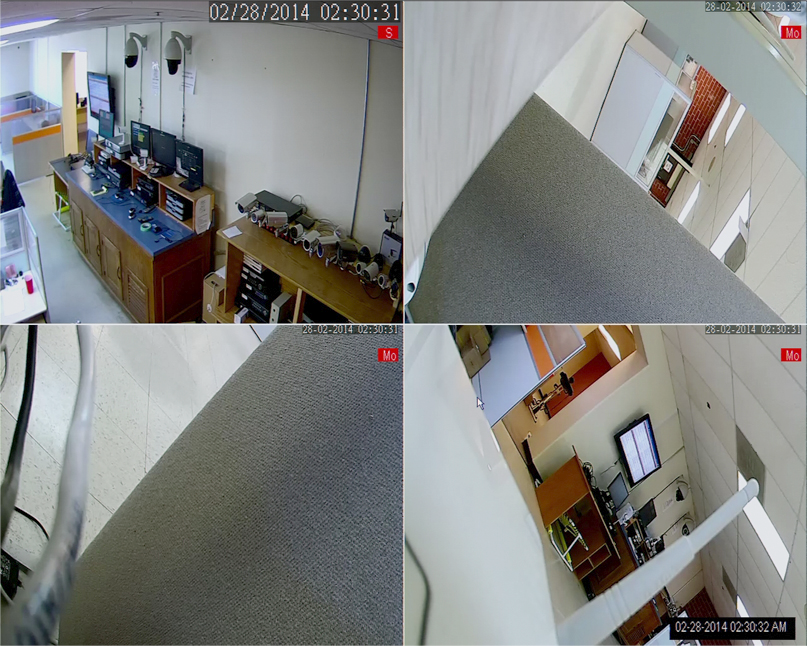
4. Once you see a live video stream, your setup is complete!
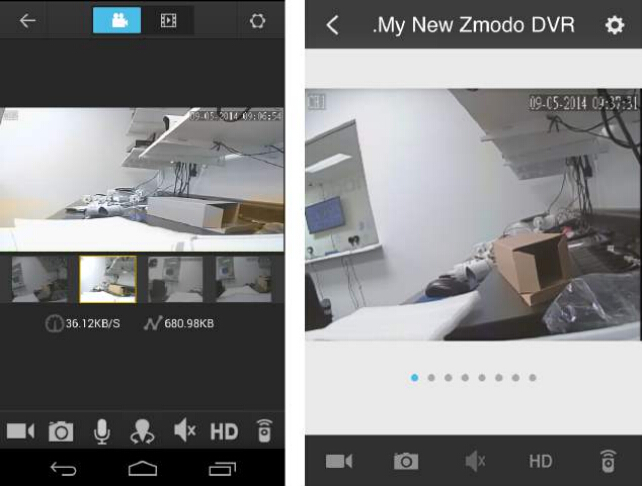
4. Mobile View
1. Download”Zsight”App from Google Play or App Store on your mobile device;
2. Connect your mobile device to the same local network as your NVR. Please make sure your mobile device is connected to the internet through the same wireless router as your NVR;
3. Open the Zsight app on your mobile device and create a Zsight account. If this is your first time using Zsight, you will need to create a new account. Do so by selecting the [Sign Up] option. If you already have an account, press [Log In] and enter your login information;

4. Open the Add Device menu on the Zsight App;

5. Select “Scan QR Code” option and scan the QR code found on the outer casing of your NVR;
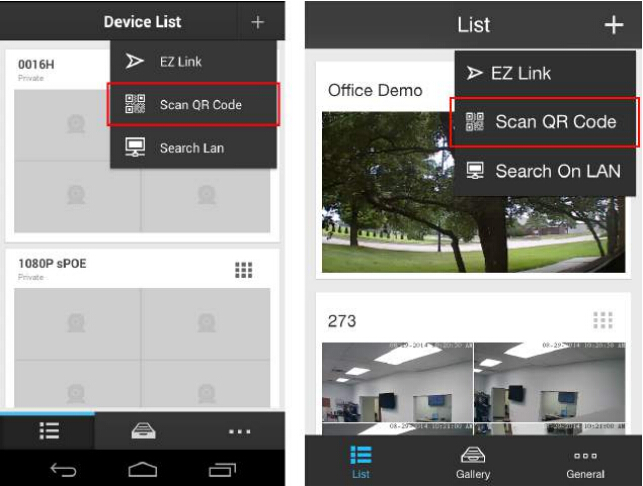
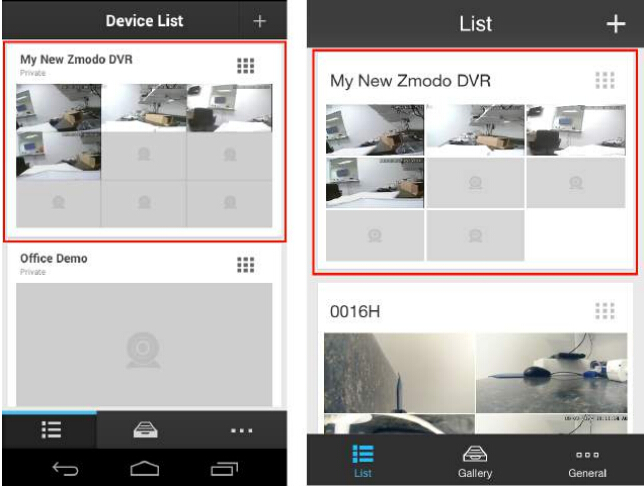
6. Name your device and select your system from the device list to view the live video stream;
7. Disconnect from your wireless network and access the DVR using 3G/4G. Connect your mobile device to a different internet connection from your DVR (3G/4G or any other wireless connection) and repeat step 7. Our product servers will automatically authenticate your NVR for remote-viewing capabilities.