

How to install wireless home security camera system
Technology has revolutionized the way things are done and security is surely not immune to this. With the development of wireless technology things are getting better or rather even easier in surveillance! Everybody loves efficiency in security and it does not come better than wireless home security cameras. Wireless security cams are the next big things in surveillance and this article will give you an insight on the basic installation and set up tips you will need when installing wireless home security camera system!
The first thing you will need to do is buy a modern wireless security camera with great specifications-preferably, you can go for Funlux 4 Wireless 720P Surveillance Cameras 4 CH NVR Security System 1TB. This security system is fabricated with long-range high definition cameras, lots of memory and high level of scalability to suit modern networks protocols and mobile surveillance capabilities over the internet using smart phones. Once you have purchased the system, it's now time to start the installation.
Step by step to install wireless home security camera system
NVR Installation
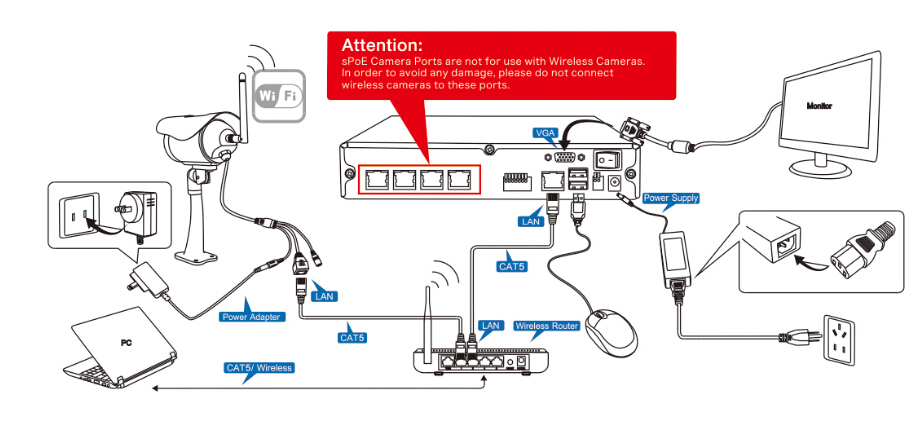
The first step is to configure the NVR (Network Video Recorder) but first you will have to power the NVR using the provided power adapter (N.B: Do Not Use any other power adapter just in case you blow up your System). The next step would be to connect your display using a VGA cable through the VGA ports of the NVR and the display. Connect your IP cameras to the LAN ports of the NVR- using LAN cables provided. Just in case you have no idea what IP cameras are then in simple terms they are cameras that communicate with the system using Internet protocols. These protocols will come in handy when communicating with devices like phones through the router. The router is connected to LAN port on the right hand side (when facing the backside of the NVR). The connection is made using a LAN cable provided. Once completed, the connection looks something like in the diagram below: You will also need to connect your mouse through the USB port.
Camera Installation
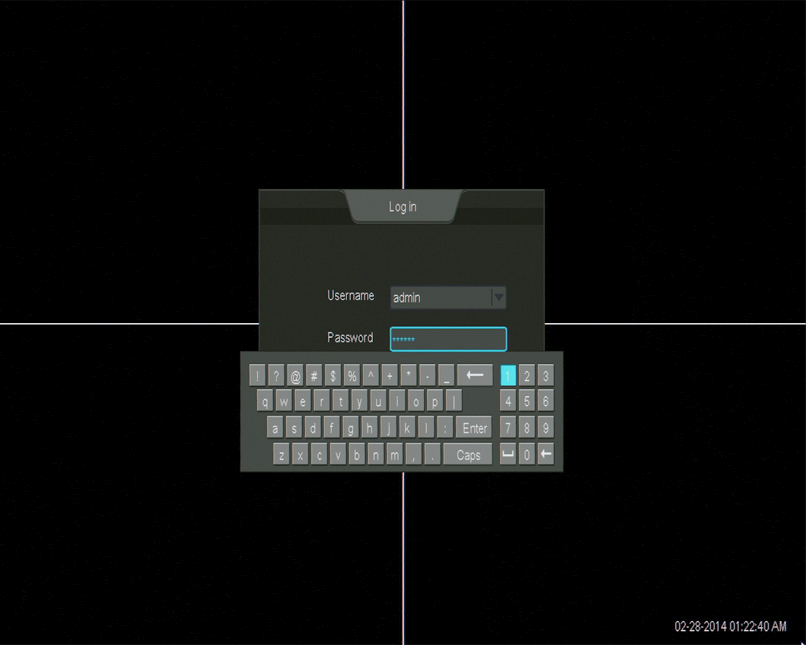
The next step is to set up and configure your new cameras in the wireless home surveillance system. As stated earlier, the NVR supports four concurrent cameras powered over Ethernet (POE). This is to imply that you will need to connect all your cameras first before you can proceed to configuring them through the User Interface and the peripherals provided. The beauty with this system is that a Linux kernel powers it. The Linux OS has a very friendly user interface to ease navigation. Just power it up then log into your system with admin as the user and 111111 as the password.
The system will automatically try to add the connected cameras thus all you have to do is wait. If it fails you will have to add them manually.
Manual Installation
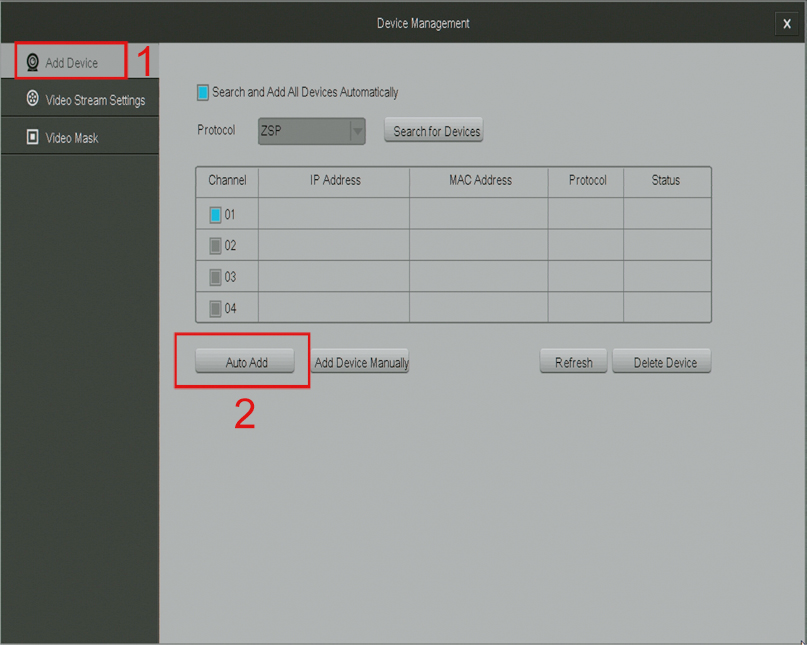
- 1. Move your cursor to the bottom left corner of your screen and locate the main menu the select on Device Management once the menu pops up.
- 2. Click on Add Device option on the left side of the window then finish by selecting Auto Add.
Once this is established, you can then select the suitable location for the cameras and mount them using designated screws and wall brackets.
NVR First Time Set Up
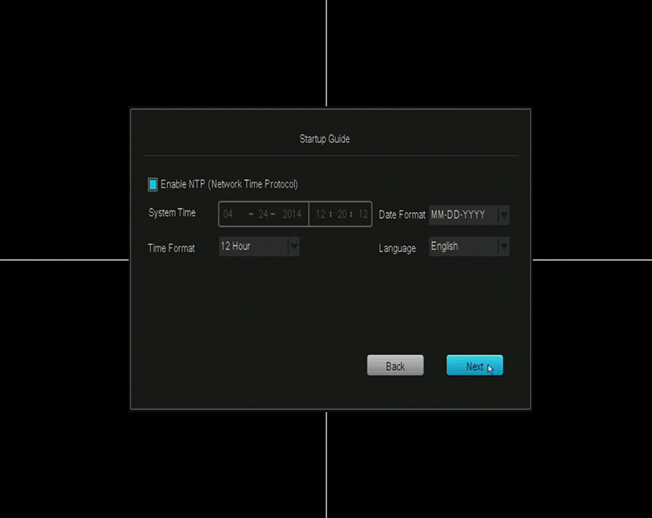
Again, the NVR user experience does not come better than a start up wizard that lets you configure your NVR once powered on for the first time. Simply click on anywhere on the screen and follow the simple steps. Enable the Network Time Protocol to allow automatic update of time lest you would like to would like to update them manually.
The wizard will also let you configure you name, phone, and email. The system allows up to 16 accounts with the administrator granted full privileges.
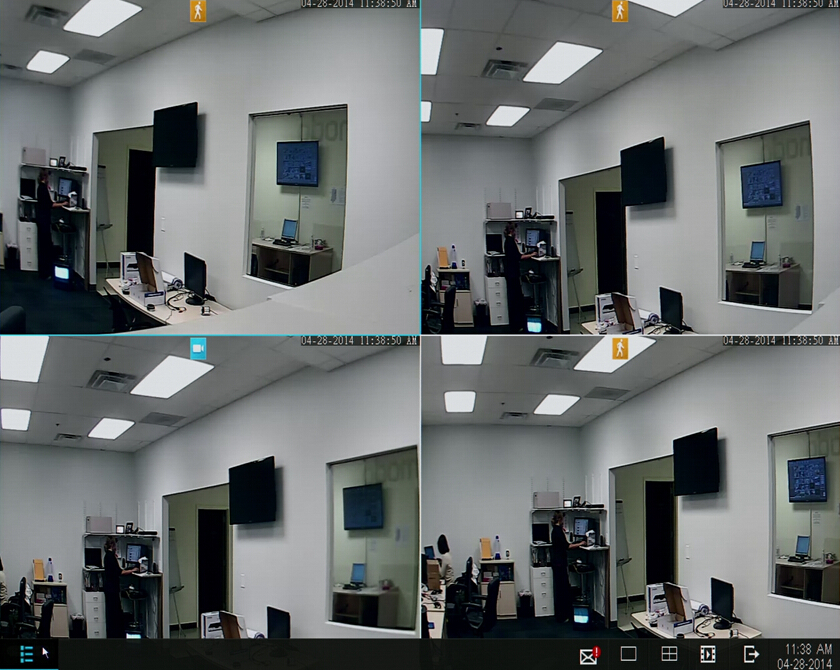
Home Screen Introduction
The main screen is what is termed as the home screen. By default, the home screen has a quad view-that is you will see all the four camera views on a single screen. The NVR also allows you to toggle between other views by clicking to the bottom left of the screen and selecting Single View. The other aspect available is the playback option that allows you to review the video footage.
Notifications are also available on the quick menu, which serves the purpose of raising an alarm probably if there is no HDD or if there is an alarm trigger, motion detection etc. In simple terms, the functionalities available on the home screen are a lot depending on your preferences.
Now, it’s time o go and pick up your wireless security camera systems for home and follow these simple installation steps and you are good to go. Security can’t get easier than this!
